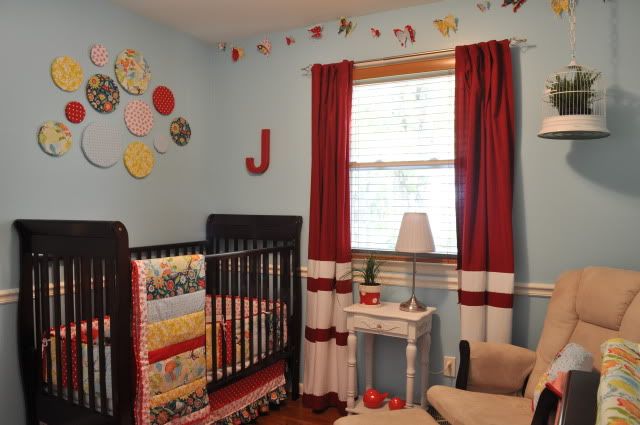
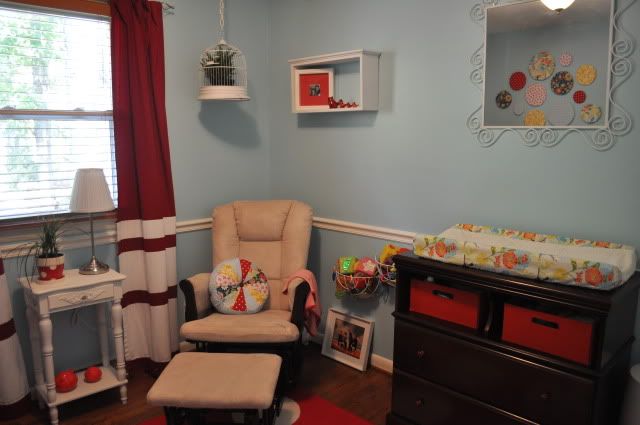
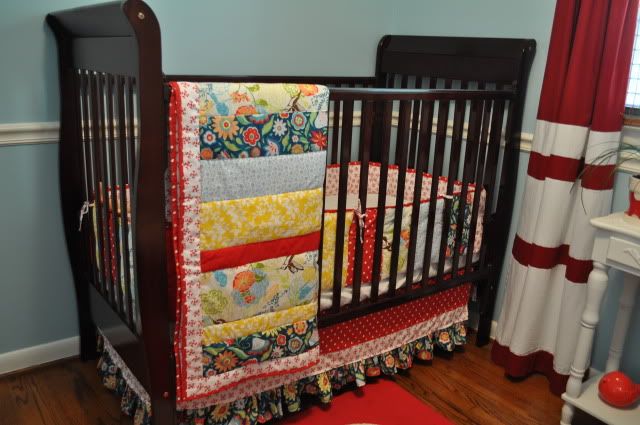
The Little Miss' bedroom is officially complete! Well, as complete as it's going to get at this point ...
We had so much fun getting this tiny space ready for her. And I really do mean "we." I wasn't sure how Jon would feel about flowers and butterflies and birdies, but I think by the end he was totally feeling the little girl love.
And I'll admit, I was a little apprehensive myself. I knew we didn't want to do traditional pink or purple. But all the strange looks I got when I'd tell people we were doing "blue" weren't very encouraging. Blue in a girls' room is one thing, but blue in a girls' room when it's your third child and you've already had two boys and your house is kinda overrun with blue ... well that's a bit risky.
But I hardly notice the blue anymore, especially with all those shots of red. Originally, I was torn between a gray/yellow/teal color scheme and this one. But since we already had so many red things leftover from other rooms in our house, I decided it would be best to be "repurposeful." For instance, the changing table bins were from Jack's nursery. The red and white polka dot rug is from Ikea, purchased at the Penn State Trash to Treasure Sale and used in my dorm room while in college. It's been sitting in storage just waiting for a chance to shine again.
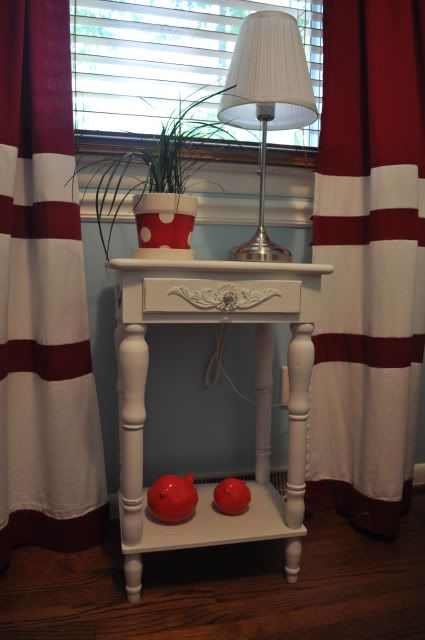
The red curtains - from the Target clearance rack. We used them in our kitchen in the Beach Nest and you may remember them from the Playroom at the
'Burb Nest. Up until last week, they were short, tab top curtains, as you can see from
this post. I thought about lengthening them with some other fabric, but couldn't find anything that matched the texture of the original curtains. Then I remembered the white Target curtains that the old owners had left behind in the master bedroom. I cut 'em up, sewed 'em on and wa-la. Drapes that brush the floor and are a little more exciting than plain red.
The white side table was an
Amazon splurge ... all $20 of it. Oddly enough, two weeks later it's now over $40. I guess that's Amazon for you.
The red/white polka dot pot and fat, little birds were on clearance at Michael's for a handful of change way back in the spring. I picked them up the same day I went crazy on material, soon after we found out Baby #3 was a girl.
We bought the
lamp at Ikea the other weekend. It was on sale at the time (of course!).
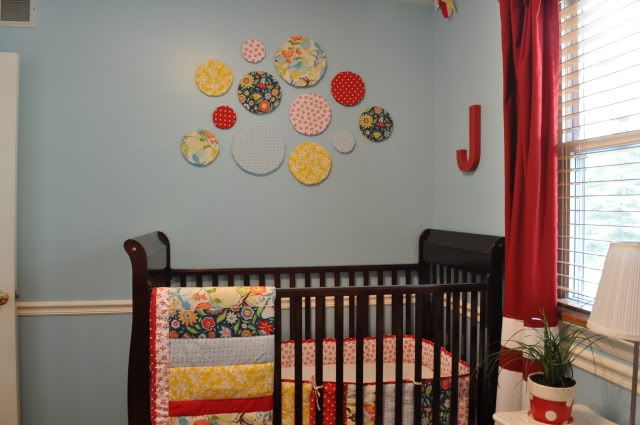
The red leather "J" - a TJ Maxx clearance rack purchase that I originally used in my office area, moved to the playroom and now has it's own little spot above the crib.
The swirly mirror, an old Ikea purchase for my office (my real office at my place of employment before I became a mama). We used it in our guest bathroom at the Beach Nest for a while and then had it in storage. Originally black, I lathered this baby up with a few good coats of white spray paint.
And while we're on the subject of spray paint - the shelf. It used to be brown wood. Another TJ Maxx clearance item. We bought this wayyyy back after our honemoony when we lived in the Original Love Nest and had nothing on the walls. We've used it in every house since then. Now it's white and in the nursery and begging for something cool to sit on it, I'm just not sure what yet.
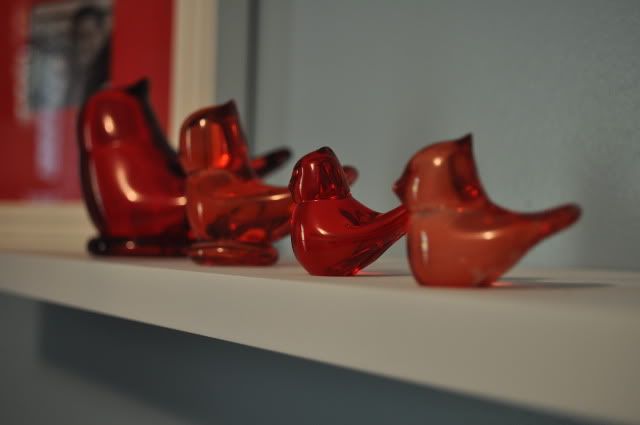
For now it holds the red glass robins which are from G'Ma's house. She had glass birds on her kitchen window sill for as long as I can remember. It's our little tribute to Grandma Katherine.
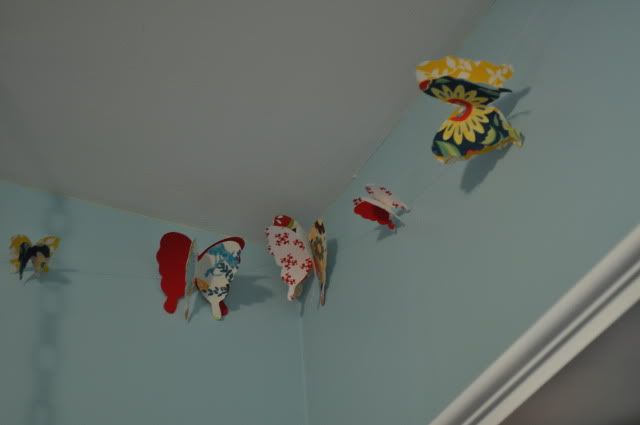
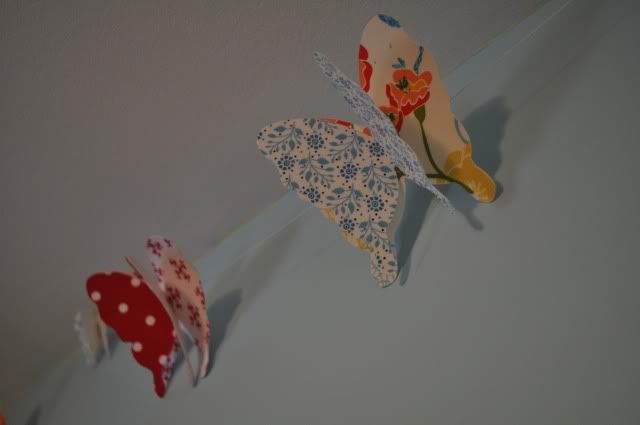
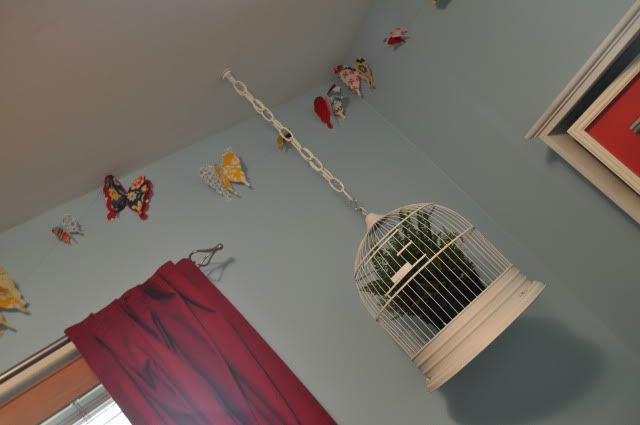
The butterfly garland was Marmie's and my labor of love when she last came to visit. The night we found out we were having a girl I spent a good hour browsing Etsy for nursery ideas. One of the first things I came across was this
adorable garland. Since I had a ton of material left over from my bedding project, we decided to make it ourselves. It really was much less difficult than I had envisioned. We adhered material onto posterboard using
Steam-a-seam and an iron and then cut it out into different-sized butterfly shapes. Then we bent the wings upward, layered a smaller butterly onto a bigger one, hot-glued them together, then hot-glued string to the back, and tacked them into the wall. This was one of my favorite projects, I wish I had another room to make one for!
Ah Pinterest, you came along at just the right time in my life. I was needing ideas for my daughter's nursery and there you were. You can see my "nursery inspiration board" (and all the ideas I haven't used yet!) at
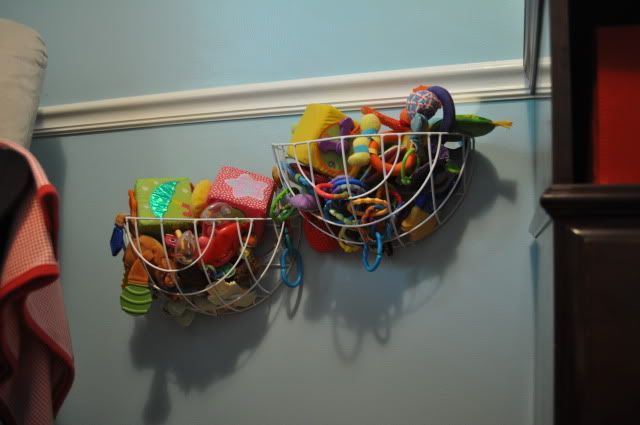
http://pinterest.com/j9tillman/nursery-inspiration/. One project I did get to was the hanging baskets to store books and toys:
Mine came out a bit different. I couldn't find any hanging planters locally and I certainly couldn't find them for $14 like the photo above claims. But oh Amazon, always there for me in a pinch, or when I don't feel like driving all over town with two little boys ... and often for a fraction of the cost! You can snag some yourself for less than $5 each
here. We spray painted ours white and my husband hung them when I wasn't watching, otherwise I may have spaced them out a tad more. No matter, they get the job done!
Another idea that's all over Pinterest is hanging rounds of fabric using embroidery hoops:
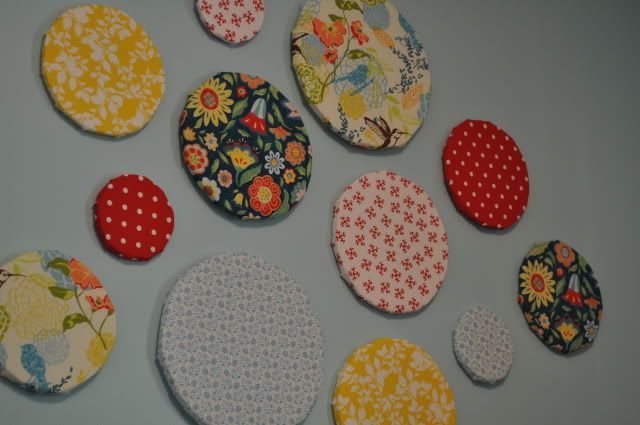
Well I went to Jo-Anns to pick up some embroidery hoops and almost had a baby righgt there after I saw the price: $14-$20 a pop! I did some quick thinking and came home with two squares of styrofoam ($4/each with a coupon). I cut the squares into different-sized circles, wrapped them in fabric, stapled it to the back and hung them up on the wall with tiny nails. This is a real DIYer: No husbands were involved in the making of these circles! But if they were, I'm sure my artwork would have been centered and better proportioned.
Once we settled the flowers/birds/butterflies theme I knew Baby Girl needed a birdcage. Something like this:
But these things are hard to find for less than an arm and a leg. My mom was visiting my Aunt Jani the other week and happened to mention my fruitless search. Aunt Jani walked out into her utility room, grabbed this number off the shelf and offered it as her contribution to the nursery. It used to be a vintagy-green and metal, but I spray painted it as well (and probably completely devalued it) to match the rest of the room. We picked up a little fern at Ikea the other weekend and Jon strung it up with a hook and chain. Just to be safe we put this in a corner where the baby would likely not be, just in case the 60 lb. test hook doesn't live-up to its claims.
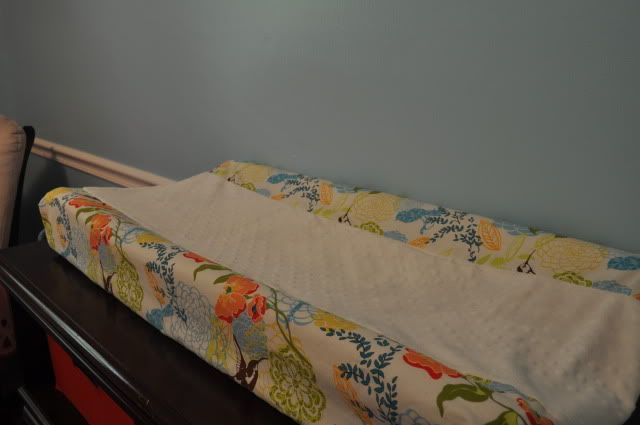
I couldn't let Baby Girl's first diaper change be on an old-hand-me-down changing pad cover, now could I? Esepcially when it was a boy-blue-hue and this room is most definitely a girl-blue. So what else to do but make one myself? I found
this tutorial online, but made mine a bit different. I wanted a soft, cozy material in the middle. And since I had ripped apart an old bumper I picked up at a hard sale, I had long strips of that soft, dimply material just waiting to be used (it also found it's way to my camera strap project). I put a piece of the soft stuff down the middle and did the two sides in some leftover birdy/floral pattern. It was really easy, so now I suppose I need to make another one. This changing pad cover is currently for decorative purposes only. Jude-the-pooper isn't allowed near it, at least not at this time. That kid is a mess!
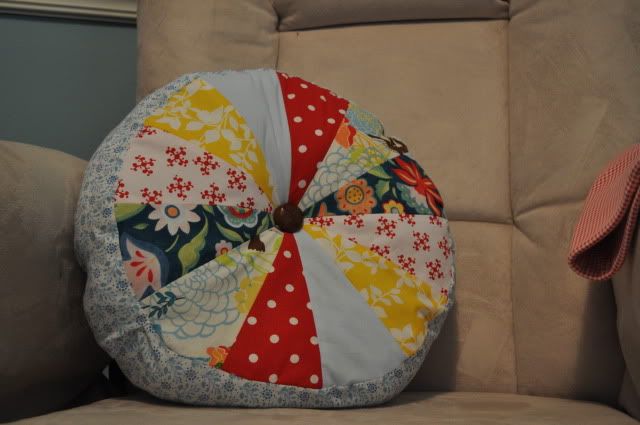
I've been scheming up pillow ideas since Day #1. Originally I was going to do one of those flower-petal pillows, but I'm already tired of seeing them. Maybe later. I found a lot of cute ideas but ended up going with the sprocket pillow from this
blog. So easy, so cute, even the hubster was impressed. I'm sure I'll add another pillow to the mix in the future, but for now I'm all nursery-projected out!
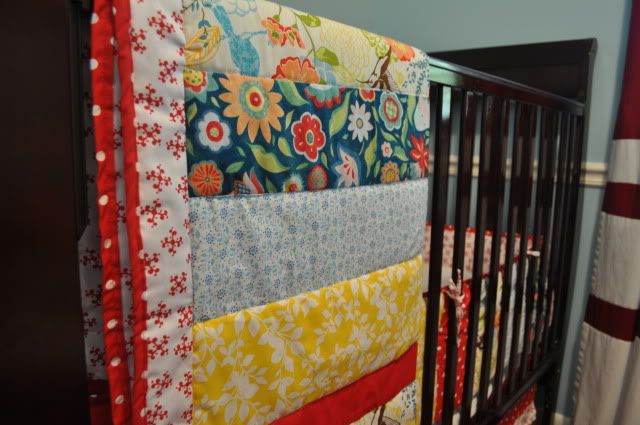
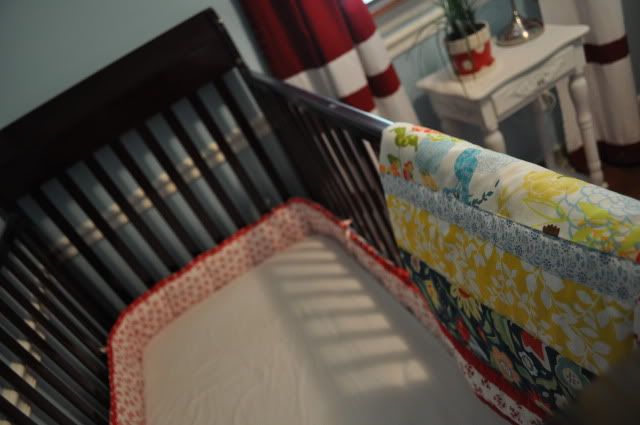
And finally, the real trial by fire, the ultimate test of my patience, the total "never say third babies don't get special attention" project - the baby bedding. Baby Girl, just SEE how much I love you!
This was a killer! I learned a lot, and I did save myself a ton of money on baby bedding. But since baby bedding isn't necessary anyway, you could also say I spent more than I needed to. The total amount I spent on material in the nursery was around $40 (and that was me going on a hormonal splurge and
not waiting for a coupon to come out). I probably used about half of the material on the bedding, so you could say I dropped a whopping $20-$30 on my girl's quilt, bumper and bed skirt. Not bad.
But it's also not perfect. I will not show you any close-ups. Just bear in mind that this was my very first quilt EVER. I had no idea what I was doing. I just looked off of Jude's crib quilt and did a few Google searches and out came this.
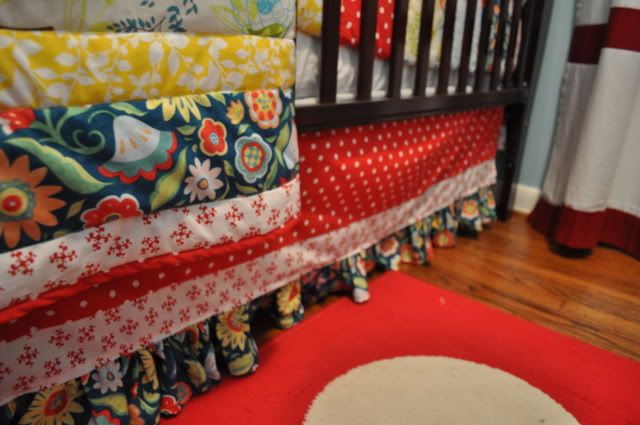
The bedskirt was the easiest aspect. Originally it was just a strip of red and white, but it ended up being too short and I decided it needed a ruffle. Since I had a lot of blue leftover that's what made the cut. If I had to do it over I'd switch the blue and the white around, since I believe that a ruffle should be made of light fluff and not heavy blue. But I digress. It wasn't worth another moment with my seam ripper, we are too well-acquainted as it is.
The bumper I picked up at a yard sale, ripped off the old cover and made a new one (but you can also buy bumper forms at Jo-Anns). It was the WORST part of this project, nay the entire room. There were a few times when I just wanted to find a dark, quiet corner to crawl into and cry. I spent hours this spring planning, drawing,
mathematizing this project onto
graph paper so that it would be just right. It didn't make any difference. I always came up short, pieces didn't match up, I messed up the seam allowance, etc. The culminating event occured late one evening when I was stooping bleary-eyed over the serger, trying to finish off the edge of the bumper after spending half an hour re-threading the machine 5 times in a row... the needles snapped in half, flew up and hit me in the eye. Baby Girl almost did not get a bumper after that night. But if nothing else, all this time with my sewing machine has taught me to throw my perfectionist ideals out the window and just be happy with what happens. I'm not trying to start an Etsy business, I'm not trying to get rich making baby bumpers, I just want to give my little girl a sweet space to rest her head... and maybe an excuse to put off the house cleaning another day longer.
Which brings me to my next point: When do I get all this done, you ask. Well, I do almost all my sewing in the evenings after the boys go to bed. I attempted to sew once or twice while they were awake, and presumably occupied elsewhere. But those little guys just love "Mommy sewing 'achine." Jack is immediately overwhelmed with the urge to push buttons. I always have to re-adjust the settings on my machine if I walk away for more than a second. And Jude has a tendency to trip over the cord. Over and over again. One Sunday afternoon he tripped over it about 10 times in a row, unplugging it each time. All I wanted to do was finish the one seam I had started whilst both boys were still napping! Let me tell you, it's not worth it! I did pull him up onto my lap after that, just so I could finish off the edge. I spent the next 10 minutes batting his hand away from the needle... and then laughing profusely at the way he bobbed his head to the rhythm of the needle. That kid can find a beat in anything!
 |
| Jude and I had fun at Target making sure Sister got a hooded towel to go along with her brothers. |
And so I hope Baby Girl understands that this was not just a Mommy-thing. Daddy helped. And Marmie lent a hand. And even Poppa did some spray-painting so we wouldn't have to breathe the fumes. And there are two anxious big brothers just waiting for the little being to come occupy her room. Jack is obsessed with "Sister's blanket" and "Sister's pillow." He waited days for the mailman to bring "Sister's table." And when a babysitter by the name of "Julia" showed up last week to watch the boys for an evening, he immediately grabbed her hand and directed her to "her lamp."
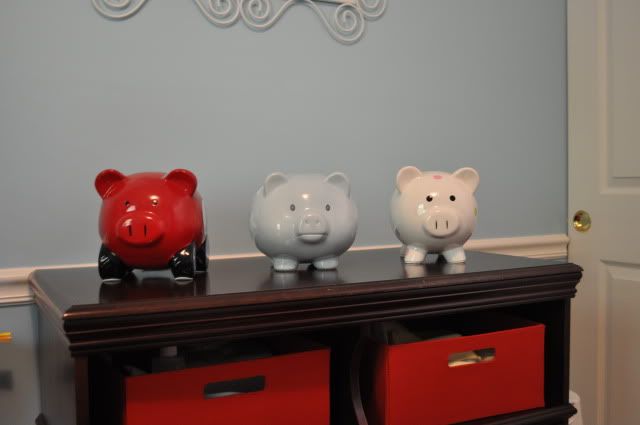 |
| And of course she needed her own piggy bank as well! |
Jon asked me why I didn't put this much effort into the boys' nurseries. Well, Jude never had his own nursery. And when we had Jack, we were just a bunch of DINKs spending our weekends wandering around Babies 'R Us. And with a bunch of friends and family ready to jump all over the baby registry. This is third baby, first girl, and a bit of a surprise in coming. But she's special too. And I know I've said it before, but there's something about carrying a girl that makes you feel feminine, like I just want to get down and go all traditional-woman here. But there's also this incredible sense of responsibility to be an example, to bring up this little girl to embrace her womanhood in a world that doesn't seem to value that trait so much anymore. I want her to race around with her brothers, play a sport, go to college, get a career ... but I also want her to sew, and bake, and be a loving wife and have her own babies to kiss. And not that homemade pillows or spray-painted birdcages are the way to achieve that. Not that they are important at all. But it's just my way of saying, "I love you. I've been thinking about you for months and months. I can't wait to meet you. I'm so looking forward to sharing this life with you."
And that crib quilt? I'm totally sneaking that into her car when she goes off to college.
And now I know what you're thinking, "Uh, Janine, what if this baby isn't a girl after all?"
Well, I am completely prepared for that. Believe me, I've thought about it many times in the past few months. And I have a Plan B. I haven't completely worked it all out yet, but it will probably include sending Marmie back to the house before we come home to de-feminize the nursery and put it all away in a box in storage until next time. Because if this baby is a boy ... well, we can certainly try again. ;)
